 |
|
Calculating the number of calendar days between two dates is fairly simple. However, if you need to calculate the number of work days, it gets a bit more difficult. Not only do you have to account for weekends, in many instances you also have to account for holidays, which change each year. This formula does both, but it requires that you enter your list of holiday dates in a separate formula. The list should include only holidays that will occur during the work week but can include more than one year of holidays in the list. To use this formula, simply copy it into your report and put your field names in on the second and third lines in place of the field names I have used. If your date field is a datetime format, change the format to date within the format, ie if ResignedDate is in DateTime format, enter the field as Date({table.ResignedDate}). Next put your holidays in the second formula and place this in the report header, suppressed if you wish. Note: this formula includes in the count both the starting date and the ending date. • Create formula called WORKINGDAYS Weeks:= (Truncate (End - dayofWeek(End) + 1 Local NumberVar i; Weeks + Days - Hol
• Create formula called HOLIDAYS and place this into the Report Header. (suppress this field from printing) When a group will go beyond one page, you can print a message at the bottom of the page using the following three formulas: • This formula goes on the Group Header: WhilePrintingRecords;
WhilePrintingRecords; • This formula goes on the page footer: WhilePrintingRecords; One of the best ways of boosting performance in Crystal Reports is to use SQL expressions. In favorable cases, a SQL expression can dramatically cut the time needed to refresh a report. It can also reduce network traffic and thereby improve the performance of the network as a whole. The increase in performance may not be noticeably different where the database is small, but where the database is considered large, then using SQL expressions can have a dramatic effect. The slow way The fast way Next, open up the Select Expert. Delete the existing criterion, and create a new one using the SQL expression. After you have closed the expert and refreshed the report, you should see exactly the same records as before. However, now choose the Show SQL Query command from the Database menu. The SQL code will now have included a WHERE statement. The big difference is that the record selection will now take place on the server, and only the records which meet the criterion will travel across the network. With a small table, with a few hundred records or so, you might not notice a difference. But if the table contains tens of thousands of records, and if you only want to select a small percentage of them, the performance gains could be substantial. The Disadvantages In addition, SQL expressions are not available for all types of databases. Crystal Reports only supports them for what it calls 'SQL databases', such as SQL Server and Oracle, as opposed to 'PC databases' like Access. If the report is based on a PC database, you won't see an entry for SQL expressions in the Field Explorer. Furthermore, the main benefit of SQL expressions is only available with true client/server databases, such as SQL Server, Oracle and Sybase, where the processing is performed on the back end. With file server-based SQL databases, Crystal Reports permits SQL expressions to be used, but they won't deliver the same performance gains. CR will send the correct SQL code, complete with WHERE clause, to the database, but the actual record selection will be performed by the ODBC driver or OLE DB provider on the local machine. So you don't get the benefit of reduced network traffic. Despite these drawbacks, SQL expressions are definitely worth adding to your armoury of reporting techniques. If you are working with large tables in a true client/server environment, you will be pleasantly surprised by the improved speed of your reports. Give them a try. Make your reports easier for yourself - and others - to understand A well-tried method of coping with this is commenting. By adding explanatory notes and comments to their programs, they provide themselves - and other programmers - with valuable reminders of what the program does and how it does it. The same technique can - and should - be applied to reports. If your report is in any way unusual or complicated, you owe it to yourself to document it in the form of comments. This will also be helpful to others that may use your report in the future. Where to put them?
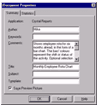
The comments show up in the File Open dialogue (click the Properties button on the dialogue's toolbar to show the comments). The problem with this approach is that the comments are not particularly easy to edit or to read. The Document Properties window only shows five short lines at a time. The File Open dialogue is more spacious, but the comments cannot be edited in that window. Also, your colleagues will have to know where to look. If they are not aware of this feature, they might never see the comments. Still, this type of commenting might be a good option for short comments if it is used consistently by all members of your team. Comments as text objects But, again, this approach is more suited to shorter comments. If you have comments that contain more than a few lines of text, they will soon clutter up the design surface and make it much more difficult to see the important parts of the report. Comments in formulae Using Crystal syntax, you can add a comment to a formula simply by typing two forward slashes in the formula code. Whatever text you then type on the rest of the line will be treated as a comment (and will show up in green in the formula editor). Comments have no effect on the functioning of the formula, nor do they impact the performance of the report. If you prefer Basic syntax, just type an apostrophe instead of the two forward slashes. A dedicated comment formula may be used to explain the overall structure of the report. They could show the report’s version history, the names and contact details of its designers, a copyright notice or any similar details that users might find useful. Make it obvious We normally put these objects near the left edge of the Report Header band, where they will be immediately visible to anyone working on the report in design mode. To prevent them showing up when the report is previewed, exported or printed, we conditionally suppress them, using a formula that always returns true (such as 1 = 1). (If we suppressed them unconditionally, they would appear in light grey in design mode, and would therefore be less obvious). Use the following steps to create a formula and to format it for display as a calendar. dim CalendarBase as date Change {Table.YourDateTimeField} below to your DateTime field. CalendarBase = DateValue({Table.YourDateTimeField}) DayString is used to create a header in the formula output. DayString = "Su Mo Tu We Th Fr Sa" + chr(10) + "--------------------" The following syntax finds out what day of the week the first day of the month is. The formula then loops through the month's data, creating a string running total of the dates and adding carriage returns every seven days. StartingDate = DateValue(Year(CalendarBase), Month(CalendarBase), 1) 2. Save and close the formula. 3. On the 'Insert' menu, click 'Group'. From the first drop-down box, click the same DateTime field as used in the formula. 4. From the 'The section will be printed:' drop-down box select 'for each month'. Click 'OK' to close the 'Insert Group' dialog box. 5. Place the formula on the report in the Group Header section. 6. Right-click the formula and select 'Format Field'. 7. Click the 'Font' tab and from the 'Font' drop-down box click a fixed width font such as 'Courier'. 8. Click the 'Common' tab and select the 'Can Grow' check box. Click 'OK' to close the 'Format Editor' dialog box. 9. Increase the width of the formula field to two inches or greater. When you refresh the report you will see a calendar for each month. 2. Select 'Formula Fields', and click the 'New' icon. 3. Type a name, such as CheckBox, and click 'OK'. This launches the formula editor. 4. Create a formula similar to the following: // (xxx) represents the character you want to display CHR(xxx) For example: CHR(254) displays a check box with a check mark in the report and CHR(252) only displays the checkmark without the box in the report. // CHR(254) - displays a box with a check mark 5. Insert the formula into the report. 6. Right-click the @CheckBox formula field, and select 'Font'. 7. From 'Font', select 'Wingdings', and click 'OK'. You should see a checkbox in the report. |